- Instant email delivery
- Global licenses
- Secure checkout
- 24/7 customer support
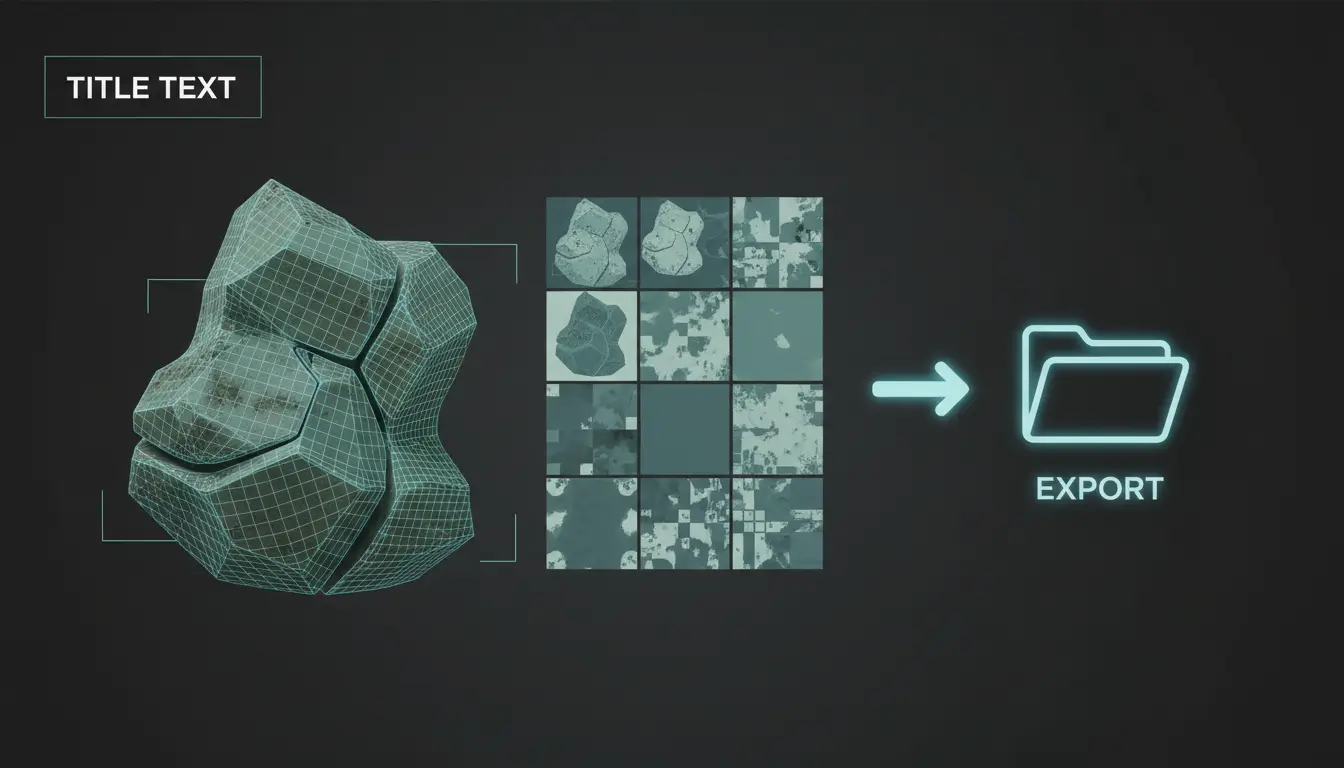
Autodesk Remaker bakes color and surface information from photogrammetry scans into texture maps you can export alongside a reconstructed mesh. The tool projects the photographic color, shading cues and surface detail onto UVs, producing maps that carry the object’s realistic appearance into other 3D applications. Exported textures let you preserve the scanned subject’s look without relying on the original photos, so the mesh behaves like a material-ready asset in visualization, game engines, or downstream modeling tools.
Typical outputs include baked color (albedo/diffuse) textures and additional surface maps such as normals and ambient occlusion where supported. Remaker creates a UV layout or texture atlas for the mesh so a single set of image files can wrap the model cleanly. Exports are commonly offered in standard image formats (PNG, JPEG, or high-dynamic-range formats when needed) and packaged with OBJ/FBX geometry so most DCC and real-time engines can import them directly.
In practice this means you can scan an object, run Remaker’s baking process, then move both geometry and textures into Modo, Blender, Unreal Engine or a CAD/visualization pipeline and immediately see photorealistic surface appearance. If you want a complementary point-cloud or scan cleanup workflow, consider tools like Autodesk ReCap Pro to prepare inputs before baking. For vendor and product details, see the Autodesk website.
When you export textures from Autodesk Remaker you’ll most often get an albedo map that carries color information and one or more surface detail maps. Normal maps encode fine surface directionality captured from photos, and ambient occlusion maps help convey soft shadowing where geometry occludes light. Depending on settings and target export, you may also generate roughness/specular maps or high-dynamic-range color for advanced rendering. Together these maps recreate lighting and material cues on the mesh without reprojecting original imagery, making the assets ready for realistic rendering or interactive use.
When preparing a scan or sculpt for export, begin with autodesk remaker principles: clean the mesh, remove stray geometry, and decimate strategically so maps and export performance remain optimal. Start by isolating and deleting unattached faces, tiny islands, and interior geometry that won’t be seen in the final render or print. Fix non‑manifold edges, weld duplicate vertices, and flip inverted normals so baking and shading are predictable. For texture quality, ensure UVs are non‑overlapping (unless intentional) and that seams are placed in low‑visibility areas.
Decimation should be guided by the intended use: preserve silhouette and high‑detail areas for close views, reduce flat surfaces aggressively. Use edge‑preserving decimators or perform local retopology for animation-ready meshes. After simplification, recompute vertex normals or bake normal maps from the high‑res scan to the reduced mesh to retain detail. Run a final validation for scale, axis orientation, and unit consistency to avoid surprises on import.
For additional tooling and automated cleanup, consider companion Autodesk solutions; see the Autodesk ReCap Pro page for related workflows. If you want official docs or product comparisons before exporting, check the Autodesk product overview.
Workflow checklist: import the mesh, run an automatic cleanup to remove zero‑area faces and isolated vertices, then identify and delete hidden inner shells. Fill small holes but avoid aggressive filling that changes silhouette. Apply a targeted decimation pass, test by toggling subdivision to verify preserved detail, then bake normal and AO maps from the original high‑res to the decimated mesh. Export incrementally (OBJ/FBX) and validate in the target application or render engine. Keep a lossless backup of the high‑res source so you can re‑bake if adjustments are needed.
autodesk remaker users should begin by repairing obvious topology problems: fill holes, remove non‑manifold edges, and weld duplicate vertices so the mesh is water‑tight and normals are consistent. Run a vertex‑merge or “remove doubles” operation and recalculate normals to avoid shading artifacts when baking textures. Check for tiny isolated faces and degenerate triangles that can break projection baking.
Once topology is clean, validate or create UVs: ensure shells are laid out in 0–1 space, avoid overlapping islands unless intentional, and fix flipped or zero‑area UVs. If creating proper UVs isn’t feasible, enable Remaker’s projection options to project textures onto the surface during baking—this preserves detail even with imperfect UVs. Always bake a quick low‑resolution test to spot seams and projection errors, then iterate.
For broader toolsets and workflows, see the Autodesk product overview on the official site and explore related Autodesk tools for mesh processing.
autodesk remaker helps you decide which map types (diffuse/albedo, normal, displacement) you need and which file formats suit your pipeline. For editable, lossless color and high dynamic range, choose TIFF or PNG; JPEG is useful for small previews but discards detail. Match your output to the target: game engines and web viewers often prefer PNG/JPEG with mipmaps, while offline renders and archival workflows benefit from TIFF or EXR. Higher resolutions such as 4K or 8K reveal more surface detail but increase file size, memory use, and processing time—export only the resolution your downstream tools and hardware can comfortably handle. For official guidance and product details, visit the Autodesk site.
Decide by function: albedo/diffuse stores color—use PNG or 16-bit TIFF if you need wide gamut; avoid JPEG if color fidelity matters. Normal maps are typically 8-bit tangent-space PNG or TGA for shading; they’re compact and provide surface detail without geometry. Displacement or height maps should be exported losslessly (16-bit TIFF or EXR) when you plan to convert into true geometry. Choose resolution based on object screen size—use 2K for small props, 4K for medium assets, and 8K for hero pieces—and consider UDIM/tiling to keep file sizes manageable. Create lower-resolution LOD variants and use consistent naming. If you capture reality-based assets, integrate with tools like Autodesk ReCap Pro to streamline point-cloud-to-texture workflows and ensure your exported maps align with the rest of the pipeline.
For reliable results, store master textures in lossless formats — PNG or TIFF — at the highest practical bit depth. Keep your color (albedo) maps in sRGB and treat normal, height and metallic/roughness/ambient occlusion maps as linear. Name maps clearly and consistently so tooling and teammates can parse them automatically: use object_albedo.png, object_normal.png, object_roughness.png or packed files like object_mrao.png when channels are combined.
Maintain a consistent UV space and texel density across related assets: choose a target texel size (for example 4.7 px/cm) and stick to it so baked details and tiling match. For UDIM workflows, include the tile index in filenames (object_albedo_1001.png). Avoid lossy JPEG for masters — it introduces compression artifacts that break normal/roughness precision.
If you use photogrammetry or capture pipelines, consider pairing this naming scheme with capture tools such as Autodesk ReCap Pro and review exporter guidance on the Autodesk website.
Open your project in Autodesk Remaker and confirm the reconstruction is finalized before exporting textures. Start by cleaning stray geometry, simplifying noisy regions, and filling holes so the UV unwrap remains stable. Use the Export function to create texture maps—typically diffuse (albedo), normal, and optionally ambient occlusion or metallic/roughness—then pick an output folder, file format, and resolution that match your target pipeline. Choose JPEG or PNG for color maps when you need small files, TIFF or EXR for high-bit-depth color, and ensure normals use a linear color space. Set UV padding and seam handling to prevent edge artifacts, and enable per-material export if your model uses multiple materials so each map is exported separately. Select resolution based on final use: 2K for quick previews, 4K for high-detail assets, and 8K for very large surfaces or archival quality. Use consistent naming conventions for easy ingestion in game engines or rendering software, and keep a versioned backup of both the mesh and the exported textures. If you work across Autodesk tools, consider verifying compatibility with your point-cloud and mesh workflows—see the Autodesk ReCap Pro page for related processing options.
1. Finalize mesh (clean, fill, simplify). 2. Open Export → Textures and choose maps to generate. 3. Select output folder and a clear naming scheme. 4. Pick formats (PNG/TIFF/EXR) and color spaces (sRGB for color, linear for normals). 5. Set resolution and UV padding; preview low/high res. 6. Enable per-material export if needed. 7. Export and verify in an external viewer or your target app. For official product details and compatibility notes, visit the Autodesk website.
When you’re ready to export a reconstructed model, open Project > Export. The dialog is straightforward: enable the texture maps you need (Albedo/diffuse, Normal, Specular, AO), pick a file format and resolution, then click Export. I recommend exporting a small test first to confirm settings before committing to a full-resolution pass.
For more on Autodesk workflow options, see the Autodesk product pages and the official Autodesk website.
When exporting textures from autodesk remaker, washed-out colors, blur, and missing maps usually trace back to projection settings, texture resolution, or misaligned source images. Start with the reconstruction log and preview: confirm the software used the correct projection method (planar, cylindrical, or spherical) for your subject and that UVs were generated without extreme stretching. Verify texture size — exporting at low dimensions or with aggressive compression will produce soft, posterized results; increasing resolution and using lossless formats (PNG/TIFF) often restores detail.
Next, inspect image alignment and camera calibration. Blurry or missing areas often mean input photos weren’t properly aligned during reconstruction; re-run alignment with more tie points or add masked areas to guide matching. Check that source photos share consistent exposure and white balance; wildly varying images can lead to desaturated or blown-out textures. Also confirm color-space settings on export (use sRGB for most viewers) and that any post-export tools aren’t converting or stripping metadata.
If problems persist, regenerate textures with higher sampling and enable options to fill holes or blend seams. For workflows that shift to point-cloud tools, consult the ReCap Pro troubleshooting guide for compatible export pipelines and format recommendations.
Quick checklist: increase texture size and sampling, export in sRGB PNG/TIFF, re-align photos with stricter keypoint settings, and enable seam blending or hole filling. If specific regions are missing, inspect masks and camera coverage — capture overlap of 60–80% to avoid gaps. For color issues, apply consistent white-balance to source images before reconstruction or use the software’s color correction tools. Finally, test the exported texture in a simple viewer to isolate whether the issue is the file or the target application; for official guidance see the Autodesk website.
When textures are missing or look blurry in a reconstruction, autodesk remaker workflows can recover detail without starting over. First re-run photo alignment using stricter feature matching and higher keypoint counts so images align more accurately. Increase texture resolution and regenerate UVs before baking: set texture size to 4K or 8K for critical areas.
If you prefer a dedicated capture/refinement tool, consider Autodesk ReCap Pro, or visit Autodesk for product information.
After you export diffuse and normal maps, the next step is loading them into downstream Autodesk tools so materials look consistent across platforms. Typical targets are ReCap, AutoCAD, and Revit; each app exposes a material or texture import dialog where you assign maps to the material slots. Start by keeping a clear naming convention (objectname_diffuse.png, objectname_normal.tga) and include resolution and color-space metadata in the filename or a short README so others know how to treat the files.
Practical steps: open your target app’s material editor, create or select the material for the object, and use the texture import or “browse” control to attach the diffuse (albedo) and normal maps to their respective slots. Set the diffuse map to sRGB (color) and the normal map to non-color or tangent-space normal—this prevents gamma and color corrections that will distort lighting. If normals look inverted, check the normal-channel convention (DirectX vs OpenGL) and flip the green channel if necessary. For CAD-focused scenes, reduce texture resolution to optimize performance; for visualization or render exports keep full resolution.
When importing into BIM or CAD, also verify UVs and orientation: some apps will tile or mirror textures by default. If you need a dedicated photogrammetry cleanup workflow, consider exporting into ReCap for point-cloud and mesh refinement before final texturing; see ReCap Pro for more details. For Revit-specific material workflows, consult the official Revit overview for best practices.
If your textures come from autodesk remaker, export both 8-bit diffuse maps and 16- or 32-bit normal maps in widely supported formats (PNG or TGA for diffuse; TGA or EXR for normals). In the receiving application, import textures via the material or appearance editor, then assign the diffuse to the base color and the normal to the bump/normal input. Always disable color management for normal maps and enable it for diffuse maps. Check scale and UV tiling immediately; small mismatches are easier to fix in the texture editor than after scene assembly.
Start by exporting your textured model from the photogrammetry or mesh editing tool as OBJ or FBX and confirm UVs were preserved during export. If UVs are lost or re-generated, the texture maps will not align correctly when imported into ReCap, AutoCAD, or Revit.
Import the mesh into ReCap (or directly into AutoCAD/Revit). For best results: keep geometry triangulated, include all texture files (albedo/diffuse, normal, roughness/metalness, AO), and maintain consistent naming. In AutoCAD/Revit use the material editor to create a PBR material and assign each exported map to the proper slot (albedo to base color, normal to normal map, etc.). Check color space: use sRGB for albedo and linear for non-color maps.
Finally, verify mapping in the viewer: inspect seams, adjust UV tiling if needed, and test lighting to confirm roughness/metalness behave as expected. For platform-specific guidance, see the ReCap Pro resource and Autodesk Revit overview for material handling.
ReCap Pro page · Revit product overview
autodesk remaker workflows start with disciplined capture and file management. Use sharp, well-exposed source photos with consistent white balance and plenty of overlap; work in RAW when possible and convert with minimal compression. Even, diffuse lighting and polarizers reduce specular highlights and make projection-ready textures easier to bake.
When you prepare textures, prioritize a clean pipeline: increase your texture atlas size only when source detail demands it — oversized atlases slow editors and renderers without visual benefit. Aim for power-of-two resolutions and preserve bit depth (16-bit where subtle gradients matter). For baking, pick lossless or high-quality formats (TIFF, PNG) and embed or keep separate color profiles to avoid shifts. Keep maps separated (albedo, roughness, normal, metallic) and maintain consistent naming so downstream tools auto-recognize channels. A practical convention: [AssetName]_[Material]_[MapType]_UDIM[v]_[LOD]_[v###].[ext] — e.g., bench_wood_albedo_1001_LOD0_v001.png. Track versions and LODs to allow iterative swaps without breaking references. Finally, test your exports in the target renderer or engine early and iterate on atlas tiling and texture compression settings to hit the balance between fidelity and performance.
Keep exports organized and versioned so artists and engines can swap assets without confusion. Test compressed builds on target hardware and automate naming where possible. For capture and photogrammetry-specific tooling see the Autodesk ReCap Pro guide. For broader product and licensing information visit the Autodesk official site.



 Autodesk
 Design Softwares
 CorelDraw
 Affinity V2
 Microsoft & Windows
 Windows
 Microsoft 365