- Instant email delivery
- Global licenses
- Secure checkout
- 24/7 customer support
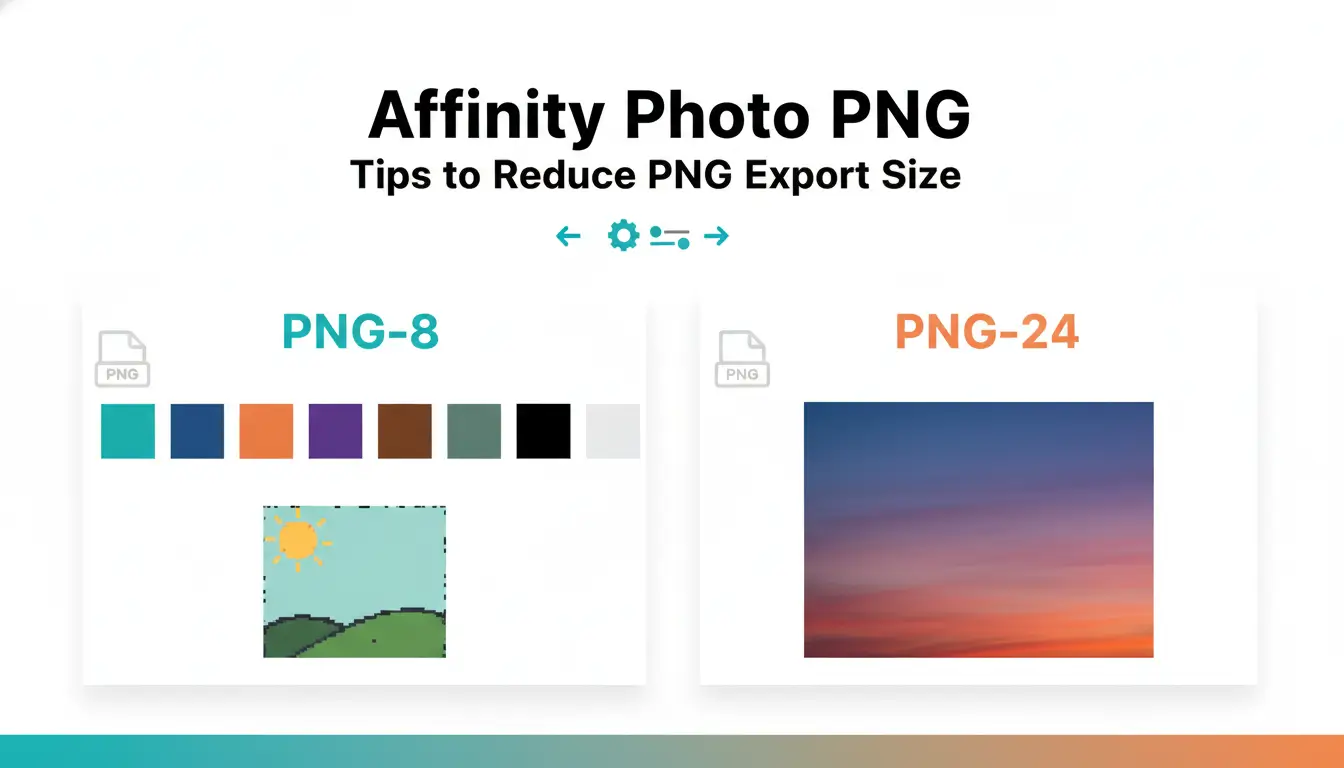
affinity photo png export choices usually boil down to two practical formats: PNG-8 and PNG-24. Picking the right one up front often yields the largest savings before you start tweaking compression or other export options. PNG-8 is an indexed format with up to 256 colors; it’s excellent for logos, icons, flat illustrations and screenshots with limited palettes because files stay small and crisp. PNG-24 is a truecolor format with full 24-bit color (and often an 8-bit alpha channel for smooth partial transparency), making it the better choice for photos, soft shadows, gradients, and any image that needs subtle color transitions.
When deciding, ask whether your artwork uses many colors or relies on semi-transparent edges. If a reduction to a limited palette keeps visual fidelity, PNG-8 with careful dithering will save significant bytes. If you need smooth edges, complex textures, drop shadows, or partial alpha blending, PNG-24 avoids banding and halo artifacts at the cost of larger files. As a final step, preview exports at target resolution and test both formats; sometimes reducing colors or switching to indexed transparency in PNG-8 produces acceptable results with dramatic size reductions.
For downloads or more on Affinity tools, see the official Affinity Photo download and consider the Affinity V2 lifetime option if you want a non-subscription alternative.
Use PNG-8 when your image is vector-like: flat fills, sharp edges, and limited colors. It’s ideal for web icons, UI elements, and simple illustrations where a 256-color palette suffices. Turn on dithering sparingly to mask banding.
Choose PNG-24 for photographs, images with gradients, or any artwork requiring smooth semi-transparency (drop shadows, glows, anti-aliased text on complex backgrounds). If size is a concern, try resizing, cropping, or testing reduced palettes first—often the right format plus sensible edits is the fastest path to a small, high-quality file.
Affinity photo png is a common export choice — understanding PNG-8 vs PNG-24 helps you balance quality and filesize. PNG-8 uses indexed color (up to 256 colors) and no full alpha per pixel, so it excels for flat graphics, icons, simple illustrations and logos where solid colors and small downloads matter.
PNG-24 preserves truecolor (millions of colors) and full alpha transparency, making it the right choice for photographs, detailed artwork and images with soft gradients, but files are significantly larger.
Practical tip: test both exports from Affinity and compare visual difference and file size. Use PNG-8 when color fidelity is acceptable and you need minimal file size; use PNG-24 when preserving gradients and semi-transparent edges is essential. For more on Affinity tools and options see the Affinity official site and check the Affinity V2 details.
When you need smaller files without sacrificing visible quality, affinity photo png choices in the Export Persona are one of the fastest wins. Open Export Persona, pick the target area, and focus on file format variant, bit depth, and compression level. Tweak these to shrink output while preserving the look you need; use the live preview to compare results.
For PNGs, decide between indexed (PNG‑8) and full‑color (PNG‑24/32). PNG‑8 with an optimized palette and reduced color count can cut sizes dramatically for graphics and UI assets. PNG‑24/32 are better for photographs or images with subtle gradients and full alpha channels. Reduce bit depth where possible, turn off interlacing if you don’t need progressive loading, and apply maximum lossless compression—Affinity’s Export Persona lets you test these quickly. If transparency isn’t required, export a flattened JPEG instead. Use dithering sparingly; it can reduce banding but increases entropy. When you find the best combination, save an export preset so repeated exports match your quality/size target without redoing the steps. For step‑by‑step options and examples, see Affinity’s getting started documentation.
Once satisfied, save that preset to accelerate future workflows. If you want to compare how Photo 2 integrates with other design apps or purchase options, check the Affinity V2 information on SoftAuthentic.
affinity photo png exports give a lot of control over file size and quality. Start by choosing PNG as the format, then test 8‑bit and 24‑bit to compare color fidelity versus size. If your image doesn’t need full transparency, disable the alpha channel — this cut can dramatically reduce bytes. When transparency is required, toggle alpha on and consider whether indexed palettes will work for flat-color graphics.
For more detailed workflow notes see the official Affinity getting started guide or our Affinity V2 information.
When preparing an affinity photo png for web or screen use, the biggest wins come from shrinking pixel dimensions and lowering image resolution before you export. A large canvas at 300–600 DPI is ideal for print, but for screens you rarely need more than the display size in pixels and 72–96 DPI. Reducing width and height to the actual display size cuts file size dramatically because PNG file size grows with pixel count, not just visual complexity.
Workflow tip: crop tightly to the visible area, then use Document > Resize Document (or the Transform panel) to set the pixel dimensions to the target width/height. Keep proportion locking on, choose a good resampling method for the content (bicubic for photos, nearest/none for pixel art), and set the DPI to a screen-appropriate value if your export tool uses it. If transparency isn’t needed, flattening or exporting to PNG with background can also reduce overhead.
Only retain the high-resolution source for print deliverables or future edits. For routine web assets, save a reduced master and export variants sized for retina and standard displays. If you want official resources or downloads, see the Affinity official download page; for related software options, check this Affinity product page.
Start by deciding final display dimensions and crop to remove excess pixels. Lower DPI to 72–96 for screen exports; DPI matters mainly for print. Consider indexed PNG (PNG‑8) if your image has limited colors — it can shrink files a lot but may introduce banding. For photographic images where smaller size is crucial, evaluate using optimized JPEG instead of PNG. Always preview at 100% and test the exported file on target devices. Keep an editable, high-resolution master in case you need to produce print-quality versions later.
When preparing UI assets, scale to the exact display size needed rather than exporting oversized files and relying on the browser to downscale. Set pixel dimensions to the final on-screen size and export PNGs with transparency preserved so edges remain crisp. Preview at 100% to judge visual weight accurately.
For multiple assets, use batch export or the Export Persona to process files in one action — this saves time and ensures consistent interpolation settings across icons and sprites. Name files clearly (icon@1x, icon@2x) so asset pipelines pick the correct scale automatically.
When downscaling, check that sharpness remains acceptable: view at native and target sizes, and apply a light sharpen or Unsharp Mask only if needed. Avoid repeated resaving and keep a lossless master. For workflow details and official guidance, see the Affinity getting started guide and consult Affinity V2 resources for related tools.
affinity photo png exports are often bloated by hidden layers, unused masks, and complex non‑pixel layer data. Before you export, save a copy and then flatten or rasterize any layers that no longer need to be editable. Merging reduces extra metadata (layer styles, vector paths, embedded objects) that can inflate PNG file size and slow down downstream workflows.
Start by deleting hidden layers and empty groups, then remove or disable masks you won’t use. Rasterize smart objects, vector shapes, and text that don’t require future edits — converting them to pixel layers removes vector metadata. Merge adjacent layers when blending modes aren’t needed, and collapse layer effects into the pixel content. Use trim and canvas cropping to eliminate off‑canvas pixels, and inspect layer thumbnails to find stray transparency or tiny layers that add unnecessary overhead.
Keep one editable copy and export from the simplified file to preserve provenance. If you use Affinity Photo often, check the official help resources for workflow tips and shortcuts to flatten and export efficiently: Affinity getting started and export guide. For background on licensing and product options, see this Affinity Photo v2 resource.
Checklist: (1) Duplicate the document. (2) Remove hidden/empty layers and unused masks. (3) Rasterize vectors and text that won’t be edited. (4) Merge down layers where blending isn’t required. (5) Collapse layer effects into pixels and trim the canvas. (6) Run a final visual inspection at 100% to ensure no artifacts. After flattening, export the PNG and compare file sizes; often a simplified structure yields markedly smaller, cleaner PNGs while preserving the intended appearance.
When preparing final deliverables, export a flattened affinity photo png for predictable cross-platform results: flattened PNGs preserve transparency, render consistently in browsers and apps, and are typically smaller and faster to load. Flatten when the client only needs a ready-to-use image (web, mockups, or print-ready PNGs) and when you’ve finalized adjustments, text, and compositing.
Keep a layered master for future edits. Save your working file with all layers, masks, and adjustments in Affinity’s native format (or as a layered TIFF/PSD for collaborators) so you can revise non-destructively. A good workflow: export a flattened PNG for delivery, then archive the layered master with a clear filename and version number.
For more on exporting options and best practices, see the official Affinity help; if you need licensing or download info, check this Affinity V2 overview.
Large areas of semi-transparency and complex color gradients inflate PNG sizes and slow rendering. When exporting graphics, especially for web or app use, prefer solid fills wherever the alpha channel isn’t needed, reduce gradient complexity, and avoid overlapping translucent layers across wide regions. These changes often cut file size dramatically while preserving perceived quality. Also consider whether the background can be flattened or replaced with a simple solid color before export — that single step frequently yields the best compression without visual compromise.
Start by auditing layers: merge or rasterize groups that rely on subtle opacity rather than visible soft edges. Replace wide, soft shadows or glows with smaller, masked elements or CSS effects when possible. Simplify gradients to fewer stops or convert them to blends with subtle banding and dithering, which compresses better than high-precision gradients. For images that only need binary transparency, export as PNG‑8 or use indexed color palettes to reduce bit depth. When using Affinity apps, preview exports at the target size — downsampling before export often reduces the need for heavy transparency.
For official resources on exporting and settings, see the Affinity download and help pages.
Affinity V2 details and purchases
Get Affinity and export guides
When working with affinity photo png exports, start with Affinity Photo 2’s own compression and sensible export settings. Export from the Export Persona or Export dialog using the lowest practical bit depth (8‑bit where acceptable), flatten or merge layers, and remove alpha channels on images that don’t need transparency. Those steps reduce file size before any external processing and preserve image quality where it matters most.
For deeper savings, chain a lossless optimizer and a quantizer or online compressor: run OptiPNG (or similar) first to strip metadata and optimize PNG structure, then use pngquant or TinyPNG to apply high‑quality color quantization for significant extra reduction. For purely lossless workflows, OptiPNG or Zopfli can often reclaim a few to tens of percent without visible change; if you can tolerate slight, controlled quality change, pngquant or TinyPNG will yield much larger wins.
Keep an eye on color fidelity and transparency artifacts when mixing tools. Test a handful of representative images at various quality settings and compare visually. If you need to purchase or update Affinity, see the current Affinity V2 information for pricing and licensing options.
To make optimization predictable and fast, automate it as a post‑export step. Use Affinity Photo’s Batch Job or export scripts to produce a clean folder of PNGs, then run a simple script that calls OptiPNG (optipng -o7) followed by pngquant (–quality=65-80) or submits files to the TinyPNG API. On macOS you can use Automator or a Folder Action; on Windows use PowerShell with a FileSystemWatcher or a scheduled task. For teams, integrate optimization into your build pipeline or CI so every asset is processed the same way. Always keep the originals and verify visual quality after automation — a short visual QA step prevents surprises. For official setup guidance and tutorials, consult Affinity Photo help.
affinity photo png exports demand a practical balance between visual fidelity and file size. Begin every export by comparing visual quality at multiple settings—different PNG bit depths, interlacing, and optional metadata strips—to see how changes affect edges, transparency and subtle gradients. Work on a short, repeatable checklist for final exports so you don’t accidentally deliver oversized files: target dimensions, color profile, resolution, and an estimated maximum file size.
When testing, export a few quick variants (for example: 8-bit PNG, 24-bit RGB, and a compressed 24-bit) and open them in the same viewers your clients will use. Look for banding, haloing around soft masks, and unexpected color shifts. Keep notes on which combos preserve alpha and which reduce size most for your typical project types. Save those winning combinations as presets so recurring projects stay consistent and you’ll save time.
Include a final step to verify files on-device: mobile, standard web browser, and a native preview tool. If you want an official build or upgrade path for the app, see the official download page at Get Affinity. For quick local resources and saved presets on commercial Affinity builds, check this Affinity resource at Affinity v2 at SoftAuthentic.
Join Our Community Now!
Subscribe to our notifications and get an instant 10% off on your next purchase! Stay ahead with our latest updates, exclusive deals, and insider tips.



 Autodesk
 Design Softwares
 CorelDraw
 Affinity V2
 Microsoft & Windows
 Windows
 Microsoft 365