- Instant email delivery
- Global licenses
- Secure checkout
- 24/7 customer support
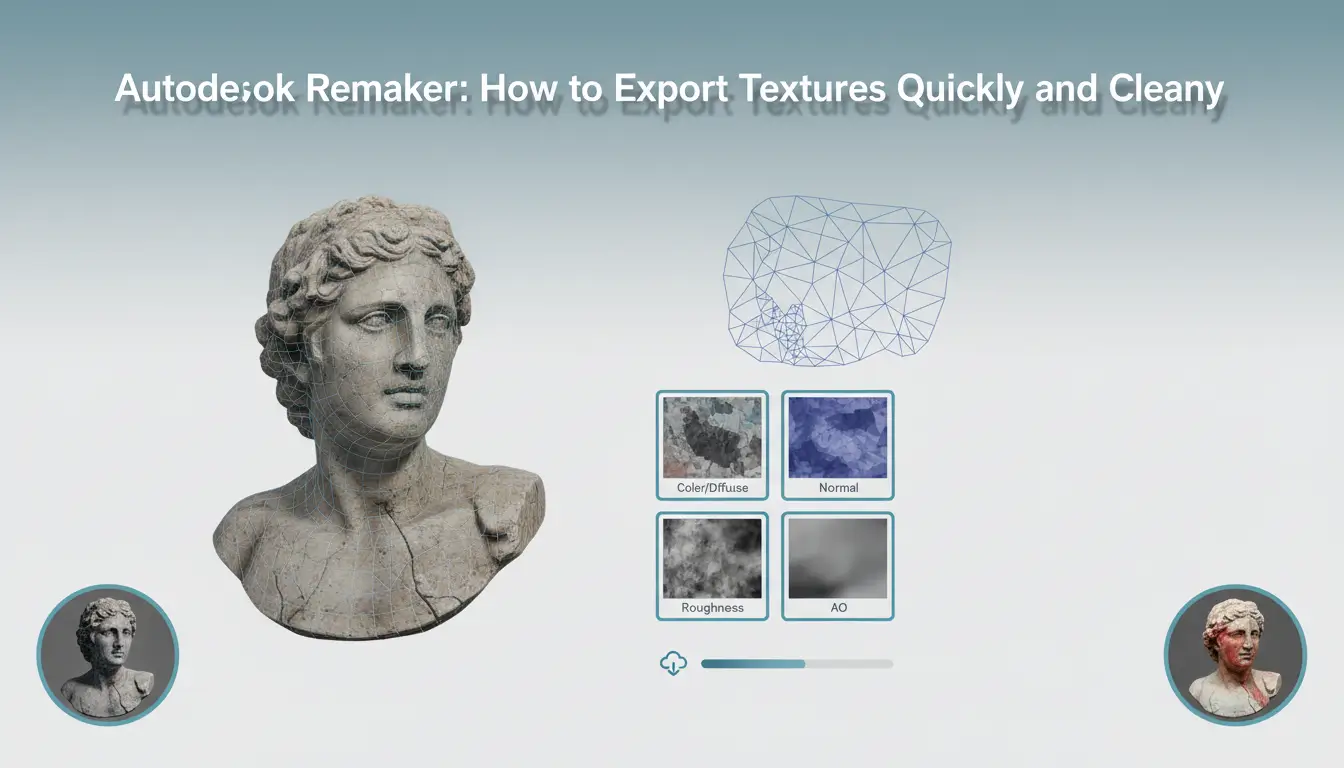
autodesk remaker’s texture export turns photo-derived color and surface detail into practical files for visualization, AR, real-time engines, and color-capable 3D printing. The workflow bakes photographic detail onto a cleaned mesh and generates the essential map types—albedo/diffuse, baked normals, ambient occlusion, plus optional specular/roughness or metallic layers—along with UV coordinates and texture atlases for complex models. Export options are aimed at interoperability: common targets include OBJ with accompanying MTL and image textures, FBX for application interchange, and polygon formats like PLY that can carry per-vertex color when a texture atlas isn’t desired. Remaker’s export controls allow you to balance atlas resolution and file size so you can optimize for render fidelity or printer requirements.
Common use cases are straightforward: architects and product designers create photo-real visualizations; game and AR developers import realistic assets with baked maps; and engineers preparing full-color prints export either texture-mapped meshes or vertex-colored geometry depending on printer support. For details about related Autodesk offerings and workflows, see the Autodesk product overview.
Remaker focuses on producing maps usable in physically based rendering and manufacturing workflows. Albedo maps preserve true color from the capture set; normal maps encode small-scale relief for lighting without extra geometry; ambient occlusion adds contact-shadow realism; and roughness/specular maps help match material response. For color 3D printing, either high-resolution texture atlases or per-vertex colors are exported depending on the format and printer pipeline. Workflow best practices include cleaning the mesh before baking, setting adequate atlas resolution for the target medium, and testing exports in the intended renderer or print-prep tool. For vendor references and official documentation, consult the Autodesk official site.
Autodesk Remaker can output baked color (diffuse) textures alongside the reconstructed mesh, and it can produce UV layouts and auxiliary map images—such as normals and ambient occlusion—depending on the workflow you choose. Exports typically include common mesh containers (OBJ/FBX/PLY) with an accompanying texture set; the diffuse map is the primary baked color output you’ll rely on for most renderers and real-time engines.
Before exporting, check your target application’s requirements: texture bit-depth, preferred color space (sRGB vs linear), UV naming, and whether it expects separate normal or AO maps. Keep texture resolution and tiling in mind to avoid unnecessary upscaling. If you use other Autodesk tools in your pipeline, consult the Autodesk software list for compatibility notes, and refer to Autodesk’s website for official format guidance.
autodesk remaker workflows begin long before export: a clean, well-oriented mesh prevents texture artifacts and speeds up baking. Start by removing stray geometry such as isolated vertices and tiny disconnected islands, then repair holes and non-manifold edges. Check and unify normals so shading is consistent, and freeze or apply transforms so scale and rotation are explicit. Ensure the model uses an appropriate unit scale — exporting a model that’s meters instead of millimeters is a common source of blurry or stretched texture maps. Perform a light decimation only if necessary to meet target polycounts, and use retopology for models that will receive high-quality UVs or baking.
Before exporting, run a quick integrity pass: merge duplicate vertices, remove zero-area faces, and validate UV seams. Export formats differ in how they handle smoothing groups and tangents, so prefer formats that preserve tangents if you plan to generate normal maps. If your capture pipeline pairs with photogrammetry or reality-capture tools, confirm the object’s up axis and origin to align with other scene assets. For capture and preprocessing tools, consider using a matching Autodesk toolchain — for example, learn more about integrating capture workflows with Autodesk ReCap Pro from this vendor page.
For official guidance on export settings and supported file formats, see the Autodesk documentation.
Follow this concise checklist before export: remove stray geometry and isolated vertices; fill or patch holes and resolve non-manifold edges; recalculate and unify normals; apply transforms and set the correct unit scale; simplify geometry only after UVs are finalized; pack and debug UVs to avoid overlapping islands (unless intentional); generate proper tangents and smoothing information; and run an automated mesh-repair tool for final validation. A short, repeatable checklist prevents common texture map artifacts and keeps your bake times predictable.
When preparing scans for baking and real-time use, clean geometry first: remove stray verts, merge duplicated vertices and consistently flip or unify normals. Decimate carefully to preserve UV integrity — avoid collapsing edges that span UV seams or densely packed islands, and use feature-preserving settings so important silhouette and texture seams remain intact.
Close small holes and non-manifold areas before baking; even tiny gaps can produce seam artifacts or failed normal/occlusion bakes. If automated fills introduce pinching, perform a light retopology or isolate problem patches and reproject detail from the high-res mesh.
Apply a consistent, real-world scale and freeze transforms so texel density maps predictably in target applications; check texel density and set export units to match your engine or renderer. For workflows and compatible Autodesk tools, see the Autodesk software catalog, or consult official guidance on Autodesk.
When preparing textures for photogrammetry or mesh painting in autodesk remaker, choose formats and resolutions that balance visual fidelity, file size, and the target renderer or platform. For color (diffuse/albedo) maps, PNG or JPEG are usually sufficient — PNG if you need lossless quality or alpha, JPEG for smaller delivery sizes. For high dynamic range data, displacement maps, or any workflow that needs 16‑ or 32‑bit precision, prefer TIFF or EXR so you retain linear color and full precision. For reference and documentation on format capabilities, see the Autodesk website.
Pick pixel dimensions to match the visible detail: small props can use 1K–2K textures, medium assets 2K–4K, and large hero pieces 4K–8K or more. Use power‑of‑two dimensions for real‑time compatibility, create mipmaps, and consider atlasing smaller textures to reduce draw calls. Keep a lossless master (TIFF/EXR) from which you generate compressed derivatives for delivery. Remember color space: export albedo in sRGB, but non‑color/utility maps (normals, roughness, displacement) in linear or non‑color space. Finally, test final compressed formats (BCn/ASTC for game engines) to ensure the visual result meets your quality budget without wasting memory.
Diffuse: PNG (with alpha) or JPEG (no alpha), 8‑bit sRGB; choose 1K–4K depending on object importance. Normal maps: PNG or TGA, 8‑ or 16‑bit non‑color, 2K–4K for medium detail. Displacement/HDR: EXR or TIFF, 16/32‑bit linear; bake at highest reasonable resolution. Ambient occlusion/roughness/metalness: 8‑bit PNG, linear/non‑color, 1K–2K for small parts, higher for close‑ups.
Workflow tips: keep a lossless master; use power‑of‑two sizes and generate mipmaps; pack repeated detail into atlases; and convert to engine‑specific compressed textures for runtime. For related photogrammetry processing tools, consider ReCap Pro as part of a larger pipeline.
For workflows originating from autodesk remaker, choose formats based on color fidelity, alpha needs, and downstream tools. Keep texture and image sizes as powers of two (512, 1024, 2048, 4096) to ensure mipmapping and GPU efficiency.
For photogrammetry-to-CAD handoffs, you may also reference tools like Autodesk ReCap Pro for processing, or visit the Autodesk website for product guidance.
Exporting textures from Autodesk Remaker is a straightforward dialog-driven process when you follow a consistent workflow. Begin by preparing clean UVs and checking mesh integrity, then open the export/bake dialog and proceed through the choices below in order: map type, resolution, file format, output path, and bake options. Doing these steps in sequence reduces iterations and helps avoid common artifacts like seams or pixel bleeding.
For upstream capture and processing workflows, consider tools like Autodesk ReCap Pro. For official product docs and downloads, check the Autodesk official site.
When the export dialog opens, run a quick checklist: confirm map types, set resolution, and choose format/bit depth. Toggle any high‑quality sampling only when needed to save time. Ensure color maps are exported in sRGB and data maps (normals, displacement) in linear. Enable padding/dilation to prevent visible seams and pick a consistent filename pattern so multiple bakes don’t overwrite each other. Use a short preview bake to spot major issues before the full resolution run; this catches UV overlaps and missing islands quickly. Finally, open exported files in your target tool to validate channels and gamma before importing into your renderer or game engine.
Quick, practical steps to bake and export textures. Open the Export or Texture Baking panel (toolbar or File > Export). Choose the map types you need—Color/Diffuse, Normal, Ambient Occlusion (AO)—and enable multiple outputs if required. Set the resolution (1K, 2K, 4K, etc.) and format (PNG, TIFF, JPEG) to match your target pipeline, and select normal space and bit depth where applicable.
If you need broader Autodesk integration tips, see our Autodesk product hub or visit the Autodesk official site.
When using autodesk remaker for mesh cleanup and retopology, prepare UVs early if you need editable texture maps. Ensure UV islands are non-overlapping, maintain consistent texel density, leave adequate padding for mipmaps, and orient islands logically to reduce seam visibility. Use checker textures to spot stretching; relax and unwrap per-material regions rather than the entire mesh when needed. For high-fidelity workflows, split dense meshes into logical shells before unwrapping, and pack UVs to maximize usable space without overlap.
If your target pipeline requires baked maps (normal, ambient occlusion, curvature, thickness), set up a clean low/high-poly workflow and perform bakes at the intended output resolution. Choose tangent-space normals for game engines and object-space normals for some offline renderers. Bake AO at a slightly coarser sample to avoid high-frequency noise, then combine with cavity or curvature maps for better texture painting. Remember to export baked maps in formats your tools expect (PNG/TIFF for color, EXR for high-dynamic-range data) and include sufficient margin/bleed. For scan-heavy projects, complementary tools like Autodesk ReCap Pro can help preprocess point clouds and meshes before UV work.
Aim for consistent texel density relative to viewing distance — for example, 4–8 pixels per millimeter for parts intended for close inspection — and set island padding to at least 2% of texture size or 4–8 pixels depending on resolution. Use a cage and tuned ray distances during normal bakes to avoid projection errors, raise sample counts and apply denoising selectively, and adopt a clear filename/versioning convention so texture sets stay tied to specific geometry revisions.
Start with a watertight low-poly and a baked high-res source. Use a cage or calibrated ray distance to prevent projection artifacts and increase sample counts for noisy passes — normals typically need fewer samples than AO. Export normal maps in the color/bit-depth your engine expects (8-bit PNG for most realtime, 16-bit or EXR for displacement/height). Pack auxiliary information thoughtfully (AO in one channel, curvature or cavity in another) to reduce texture slots, and apply conservative denoising before final export.
Test each map in the final renderer or engine, keep consistent naming (mesh_v01_normal.png, mesh_v01_ao.exr), and store bake metadata alongside assets. For official documentation and broader product resources consult the Autodesk official site.
When baking maps from high-resolution scans, choose high sample counts and precise ray settings to avoid artifacts. For smooth, reliable normals increase samples (32–128) and use a cage or carefully tuned ray distance so projection doesn’t bake neighboring geometry. For ambient occlusion, match AO ray distance to mesh scale—short distances emphasize tight creases, longer distances capture broader form shadowing.
Export each map individually—tangent-space normals, AO, curvature, thickness and height/displacement—so you can recombine them non-destructively in your material pipeline. Use 8‑bit PNG/TGA for AO and ID maps, and 16‑bit EXR/TIFF for height or displacement to preserve precision. Disable aggressive post-bake compression and keep consistent UV padding to avoid seams.
These settings yield cleaner maps from photogrammetry workflows and scanned assets; for additional workflow documentation see Autodesk ReCap Pro and the Autodesk official site.
When exporting textures from photogrammetry or mesh processing tools—especially workflows involving autodesk remaker—common problems include visible seams, blurred or low-resolution maps, incorrect colors, and missing texture channels. Start by isolating whether the issue appears in the source bake or only after import: if textures look wrong in the bake, focus on UVs, bake resolution, and ray‑distance settings; if they break on import, confirm color‑space, gamma, and bit‑depth conversions. Always check for overlapping UVs, insufficient padding (resulting in seam lines), and whether normal maps use the correct tangent space convention for your renderer.
Run a short checklist before re-baking: increase bake resolution and samples, add UV padding/dilation, and enable a cage or adjust ray distance to avoid projection artifacts. Inspect UV shells for overlaps and rotated islands that can flip colors or normal directions. For blurred maps, raise texture size (e.g., 4K) and verify your bake filter or blur settings are off. For color shifts, confirm export/import color space (sRGB for albedo, linear for data maps) and consistent gamma handling. If maps are missing, confirm export targets (diffuse, normal, roughness, AO) are enabled and saved in a supported format; prefer high‑precision formats for data maps. Re-import a single map into your target renderer to isolate issues.
For reference on supported formats and detailed settings consult the Autodesk documentation and the Autodesk software collection for compatible tools.
If you’re moving textures from Autodesk Remaker into AutoCAD, Revit or Fusion, start by thinking about color space, image format and scale. Proper export preserves hue and transparency and reduces rework when applying materials. Export textures at the final mapped resolution (avoid upscaling later), embed or export UV layout references, and keep source files in a lossless format when possible so you can re-edit without artifacting.
For most architectural and engineering workflows, export diffuse/albedo maps in sRGB TIFF or PNG (PNG if you need an alpha channel), and keep normal or roughness maps in 16-bit TIFF or EXR where supported. When importing to Revit or AutoCAD, set your import units to meters or millimeters to match your model and use pixel dimensions (e.g., 2048×2048) rather than PPI to control texture density. Name files clearly (e.g., ProjectName_Wall_Diffuse.png) and include a companion text file or UV snapshot so material placement is reproducible.
Revit handles decals and material images differently than AutoCAD or Fusion; if you target Revit, follow the application’s image size limits and mapping conventions—see the official Revit guidance for details on image import and material setup.
Revit import guidance (internal) · AutoCAD overview (external)
Export from autodesk remaker using lossless formats for color maps and high-bit-depth for data maps. Recommended settings: export albedo in PNG/TIFF with sRGB, normals in 16‑bit TIFF or EXR (linear), and opacity in a dedicated PNG alpha or separate grayscale map. Match image resolution to expected material scale (e.g., 1024–4096 px) and bake ambient occlusion to a separate map if needed. Keep UV layout and a brief notes file with scale factors and intended repeating pattern so the receiving application applies textures accurately without guessing.



 Autodesk
 Design Softwares
 CorelDraw
 Affinity V2
 Microsoft & Windows
 Windows
 Microsoft 365